Herbal Remedies

Sunday Sip - Cycle Balancing Iced Tea

By Alyssa P

CN Buyer, herbalism student, tea enthusiast

As someone with a menstrual cycle, I find that incorporating certain herbs into my routine can make a big difference in how I feel “that time” of the month and beyond. One of my favorite plant allies has been raspberry leaf for this very reason. Raspberry leaf is vitamin and mineral rich and has a toning effect which can help keep uterine cramps at bay. I’ve made it a habit to make a big batch of iced tea overnight to drink daily for at least the two weeks leading up to my period. However, I find that drinking this daily throughout the month gets me the best results. I always feature raspberry leaf in this infusion along with some other cycle balancing and stress reducing herbs. My favorite herbs to add in are rose, spearmint, milky oat tops, and red clover. The resulting taste has a black tea-like base and the rose and spearmint add floral and minty notes.

Materials:

Ingredients:

Process:

  • Add all herbs to your pitcher. I use about 2-3 tablespoons of each herb and my pitcher holds about a half gallon of water.

  • Pour water to fill the pitcher and place in the fridge overnight or for at least 6 hours.

  • Strain tea out when done infusing and enjoy!

P.S. Brittany Wood Nickerson also had a great book called Sacred and Mysterious that details more menstruation supporting herbs and recipes. I like to incorporate herbs inspired by her recipes into this daily infusion.

P.P.S. This tea can be nourishing for all bodies! Not just for those who menstruate :)

Sunday Sip - Hibiscus Cardamom Mocktail

By Alyssa P
CN buyer, herbalism student, and beverage connoisseur

Sit back and relax this Sunday with a cooling, bright, and slightly spicy hibiscus cardamom sparkling beverage. For this drink we are using Portland Syrup Co. Hibiscus Cardamom Syrup and Dram Cardamom and Black Tea sparkling water. Hibiscus can help us cool down from the summer sun and cardamom can aid digestion. Plus the sparkling water is very lightly caffeinated, making this beverage a perfect post-lunch pick me up.

To make: simply add an ounce of the syrup to a glass, pour in the Dram, add ice, and stir! Garnish with a slice of lime if you’re feeling fancy. Enjoy!

Spicy Chai Concentrate for at-home iced chai lattes!

By Alyssa P
CN buyer, herbalism student, and beverage connoisseur

This heat wave has me craving a beverage that will help me stay both cool and energized. Lately I’ve been turning to a homemade chai concentrate that is refreshing, spicy, and not overly caffeinated. Having a concentrate on hand makes my mornings easy since all you have to do is add a milk of choice and ice. Nothing complicated or heated once it’s prepped and it’s already cold from being kept in the fridge. Plus you can make it as sweet (or not sweet) as you would like! This recipe features assam black tea and chai masala spices from Boston Chai Party, a beloved local and Indian-owned brand whose mission is to empower people to make their own high quality and authentic chai at home. Happy chai making!

Materials:

Medium/large pot and lid
Strainer
Glass container for storage
Spoon for mixing
Your favorite glass
Measuring cup(s) 

Ingredients:

½ cup Boston Chai Party Chai Masala Spices
¼ cup Boston Chai Party Assam Black Tea Leaves
4 cups water
Honey, sugar, or another sweetener to taste 
Minor Figures Oat Milk
2-3 fresh ginger slices

Process: 

  • Add black tea, ginger slices, and water to a pot on high heat and stir. 

  • When the water starts boiling, turn the heat to low and stir in the chai spices. 

  • Cover and let simmer for about 5 minutes. 

  • Let cool for a few minutes and then strain into a glass container for storage. The mixture will be thick, so it’s helpful to stir as you strain.

  • If you would like to, add some honey, sugar, or maple syrup for some added sweetness. 

  • Store in the fridge for up to 2 weeks.

  • When ready to use, pour about 4 oz into a cup and add around 8 oz of milk or a milk alternative- Minor Figures oat milk is my favorite. Add ice and enjoy your homemade iced chai latte!

DIY Mask Refresher Spray!

Mask feeling a little funky from breathing your own breath? Perhaps it’s especially funky after a few handfuls of Organic Sea Salt + Onion Cashews? CN team member Emily J. has created a super simple recipe for a mask-refreshing spray that you can take anywhere! Let us know if you give it a try : )

DIY Mask Refreshing Mist-page-001.jpg

Founder Interview: Julia Teren of Thesis Beauty

Sarah, CN’s Co-Director of Purchasing recently chatted with Julia about the origin story of Thesis, the messiness of powdered masks and why we should embrace their mess, and why raw oils are the best for our skin.

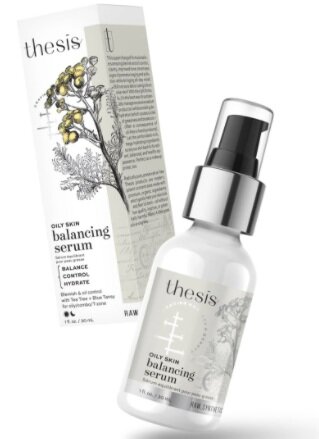
Shop Balancing Serum Here

Shop Balancing Serum Here

When / why did you get started with skincare formulation?  Have you always wanted to launch your own skincare brand, or was it more of a hobby at first?  As a first-generation American coming from one of the most devastated countries in Europe, becoming a beauty entrepreneur and formulator was beyond my wildest dreams. But I always yearned to break into the beauty industry in some capacity while also messing with ingredients here and there. I turned to serious formulating when my skin started behaving completely out of whack, being dry, oily, itchy, acneic and flakey all at the same time. I tried so many creams, lotions and serums from the brands whose names were roaring in the natural and global beauty scene. I also tried DIY recipes involving pantry ingredients. But to my surprise and desperation, nothing helped. I realized that most brands were focused on the symptoms, not the root cause of skin behavior which is why nothing helps or works long-term. I dedicated 1.5 years to thorough research of the ingredients and skin biology. With my PhD-like approach to things (hence the name Thesis), I developed and tested formulas that cured my skin. I left out pore clogging, cheap carrier oils, animal products, waxes, water and everything that's required to force oil mix with water. The results were shockingly good. And this prompted me to try myself as an entrepreneur and share my remedies with people who just like me were stuck in their search for pure and effective beauty products.

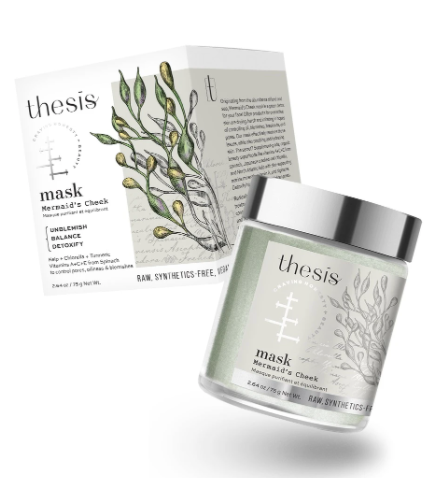
Shop Mermaid’s Cheek Mask Here

Shop Mermaid’s Cheek Mask Here

What is the benefit of powdered masks / cleansers vs other liquid / paste products? Powdered masks hit 3 points at once: No preservatives, No water, Endless Customization. Now, not all powdered products are made equal. You can see some very popular dry shampoos or powdered/anhydrous cleansers and masks that are filled with chemicals. So just because it's a powdered product, you still need to make sure it's natural or go for a brand whose natural and organic integrity you trust. So speaking of a completely natural/organic powdered product, there should be nothing synthetic in it that only functions to the benefit of the texture and shelf life, like preservatives, emulsifiers, pearlizers, colorants, parfum, etc. When properly formulated, natural powders cleanse very gently, yet effectively without stripping your skin, leaving it too tight and dehydrated like traditional foaming cleansers do. Our cleansers are made with edible ingredients which gently lift off dirt and oils, stimulating circulation and helping skin heal. All skin types benefit from gentle cleansing, even oily skin which conventional products cleanse too aggressively thus perpetuating its problems. Moving on, No water means also that you are getting a concentrate and not shipping water around - you have plenty at home. Lastly, Customization means that you are not stuck with one-size-fits-all texture and benefits. You can make your mask thinner or thicker according to your personal preference. And importantly, you can activate powder with a liquid of your choice influenced by your mood, your skin preferences of the moment, so your treatments can be better fine tuned to your personal needs. The ritual of mixing your powdered mask is one of the important parts of your self-care protocol that helps recharge, restore emotional balance and feel in control of your life.

I admit I'm always hesitant to reach for powders because I'm not the neatest person and I always feel like I am going to make a giant mess.  What advice do you have for those of us who are nervous about using powdered products? Can I ramble a bit here? :) Many people seem to be intimidated by the little messes. But have you noticed how a little bit of chaos while mixing a mask, paint or making dough can bring out your creativity and carefree, childish fun? As children we were often scolded for making messes by our caregivers who understandably were very busy and tired and didn't want to deal with additional cleanups. But unfortunately as a consequence we carry this fear of spills, splats and stains through our lives which inhibits our healthy, natural propensity towards experimentation and creativity. Therefore, against your deep-seated fears and nagging inner critic, allow yourself to make some mischievous, glorious, creative messes! Nobody is a hopeless klutz - you just need courage to practice. 

Ok, zooming in on the mask mixing. Tools should help cut the mess. You will need 3 things: a teaspoon, a bowl, and a brush. The whole process should resemble using your powdered proteins or supplements. Use a clean, dry teaspoon to take out powder from the jar. Keep a clean small mixing dish or bowl right under the jar, so you can immediately pour or spill powder straight into the bowl. If you spill some - draw a smiley face on the splat and move on. The size of the dish or bowl should be medium size, not too small and not too flat or shallow. If powder or water splashes it will be all trapped inside the bowl to be used during the mixing stage with no mess around your bowl. Then use your teaspoon to pour in liquid. Pour one teaspoonful of liquid at a time and mix to get the best consistency for your needs. Using a clean cosmetic or art brush mix powder and water with short folding movements. Our masks mix into very smooth, creamy paste that is soft and spreadable. You can apply it with your fingers or your brush. I prefer brush (a retired makeup brush) for more precise application. You may need slightly thinner consistency for the brush compared to finger application. It looks like a lot of text, in reality it would make less than a few minutes of an instructional video. It truly is simple and not as messy as people might fear. So, courage! :)

Shop West Indies Face Scrub + Mask Here!

Shop West Indies Face Scrub + Mask Here!

It seems that all this staying-at-home is inspiring more and more folks to get into masking (as proven by a Facetime call the other day where my friend had a facial treatment on the whole time!).  You have a lot of really wonderful masks in your product line.  Where do you suggest a person start who is just getting into using a face mask as part of their skincare routine? Thank you so much for the compliment to our masks, coming from you that means a lot! That is true - we've seen a spike in mask sales during the pandemic, including export which means people all over the globe are indulging in facial treatments. For a beginner, I would recommend a multitasking product that is also unisex and can be easily shared. For example, West indies facial scrub and mask which can be also used as a cleanser. This way you can experience how a powdered product works three ways, experiment with it and see what function you like best or maybe all of them. Powders that are too fine like some charcoal masks or other super fine powders will give a beginner a hard time because they do tend to splash and fly everywhere, so stick with heavier textures. Our masks are not superfine powders, so they are rather easy to mix.

Speaking of masks... With all this cloth masking wearing becoming part of our everyday lives, anything in particular you recommend to care for the parts of our face that are often covered with a cloth mask for hours during the day? That's a very good question. Like every part of our body, our facial skin also needs to "breathe". I would encourage people to take breaks from masks whenever it's safe to do so. Masks tend to trap a lot of moisture between skin and cloth. I do tend to get itchy sometimes, especially if I happen to wear a synthetic mask (which I try to avoid). With cotton masks though a similar thing may happen, although they tend to provoke less itchiness in my personal experience. Also, wearing the same mask for over 2 or 3 hours promotes growth of germs and fungi hence they should be frequently changed. I would recommend daily nasal rinses at the end of the day and daily gentle cleansing of the skin with the mildest cleanser - non-soap (powdered or oil-based) cleanser in the morning, soapy in the evening or after wearing a mask. I would caution even more than usual against aggressive, skin damaging, abrasive treatments and procedures like harsh acid peels, micro needling, scratchy sugar scrubs and such. Anything that damages the skin area covered by the mask opens the gate for infections - and you don't need to overburden your immune system with more fights than it should be picking right now.

Your Facial Recovery Serum for Dry Skin is one of your most popular product with our customers.  Can you give us an overview of the ingredients and how they work to support dry skin? Thank you, this is one of the first products in our line. I developed it trying to get under control severe flaking, itchiness and tightness of my skin. Store-bought, water-based products, albeit organic, didn't moisturize enough. Also the ones with preservatives, especially phenoxyethanol, caused irritations. My formula resolved all issues very quickly and felt surprisingly good under makeup - although soon it became obvious that foundation wasn't even needed anymore. My criteria for the ideal base for dry skin included only oils that were: 
1. 100% organic
2. RAW, unrefined
3. non-clogging
4. the highest antioxidant value
 and naturally high content of vitamin E and lecithin - the components that help skin rebuild itself. 
That's how Jojoba, Sunflower, Argan, Grapeseed, Macadamia, and Rosehip Oil made the cut. All of them are organic and RAW oils except Sunflower. We recently discovered a source of amazing Pomegranate CO2 Extract which is now a star ingredient in this rejuvenating formula. The new formula is also completely soy-free - we replaced soy-based vitamin E with Sunflower based, more potent mixed tocopherols. We never use water as this ingredient tends to dilute and disrupt many of the nutrients and it also invites synthetic ingredients that are unnecessary and sometimes harmful (preservatives, emulsifiers, etc). Therefore our products are also 100% synthetics-free. With all the seeming simplicity, there is a tremendous amount of research that goes into each ingredient and the proportions, what to put in and what to leave out. I am glad this product is helping Cambridge Naturals' customers enjoy youthful, healthy skin.

Thank you, Julia! Shop her entire line here or in-store!

Founder Interview: Nico Estrella of Waku

If you haven’t yet tried Waku plant-based tonics, you are missing out! Courtney, CN’s Marketing Manager, recently had the pleasure of interviewing one of Waku’s founders, Nico Estrella. Read on to learn about these unique beverages!

Where did Waku begin? What was the process behind creating the first batch of Waku?

Both me and Juan were born and raised in Ecuador, a mega-diverse country in Latin America that has some of the best natural ingredients in the world, due to its fertile soil and it’s advantageous position in the middle of the world. We are long-time friends from childhood and we've started multiple e-commerce businesses in the past. 

Moved by our passion for entrepreneurship, when Juan moved to Boston to do his MBA in Babson College, we started to think in our next venture that could allow us to do more to make a real difference in Ecuador. For our next startup, we decided to merge our entrepreneurship skills with a direct-sourcing business model that is allowing us to create direct economical impact in the livelihoods of independent Ecuadorian farmers.

The Waku Tonics you're about to taste are based on a recipe that has been proven and perfected through centuries of use in the Southern regions of our home country Ecuador. Locally known as "horchata lojana", it's consumed every day to support gut health. In 2017, we did a road trip through the Andes Mountains in the search of the best tasting recipe, and after trying 52 different versions of it we found the recipe for Waku. We met Miguel, a local farmer that invited us to his home and brewed his family recipe with us. After tasting it we loved it! We told Don Miguel our idea, and told him that if he was willing to share his recipe with us we could partner up with him and buy all the ingredients directly from him as his community. He happily agreed and he shared the recipe to make the first batch of Waku.

I know the Waku tonic and blend of herbs is native to the Andean region of Ecuador. Can you tell us about your first time trying "el agua que cura”?

The first time I remember drinking “horchata lojana” or “el agua que cura” was when I was 8 years old. I remember having a stomachache and my mom always used to make hot herbal teas to do help alleviate the stomachache. Normally as a kid I hated any herbal tonic because they tasted like medicine, but “horchata lojana” has a sweet taste that it was the only one I liked when I was a kid.

Can you explain the meaning behind the word "Waku”? 

Waku comes from a quechua word which means “together”. We blend “together” more than 20 functional herbs to make every bottle of Waku. Also, the sense of togetherness and community is really important for us as a company. Quechua is the most widely spoken language of indigenous people from the Andes Mountains of Ecuador.

There are so many powerful herbs in Waku!! Do you have a favorite? Or one that you feel is extra special to the drink and/or the origin of Waku?

All of them are amazing! But I think two of them are extra special: red root amaranth and escancel. They are not only anti-inflammatory but also they give Waku’s unique red color when you brew them.

Lastly, what is your favorite time of day to drink Waku? Do you have a favorite flavor?

I always drink one bottle of Waku with my lunch to help me digest better and prevent inflammation in the afternoon. I love all the flavors but my favorite one is the Ginger Lemongrass. Passion Fruit is a close second as Passion Fruit is my favorite fruit ever.

Nico and Juan, childhood friends and founders of Waku

Nico and Juan, childhood friends and founders of Waku


Six Favorite Herbal Recipes for Autumn

Fall! It’s almost here!… The official start to the season is the autumn equinox on September 22nd. I’m sure you can already feel the shift in the air, the different slant of light and the ever-changing colors of the trees.

If you read my blog or newsletters you know that fall is my absolute favorite season. Summer is pretty wonderful, of course, but I have to admit that it always feels like a huge relief when the heat and brightness of the summer sun fade into the cooler, more gentle days of autumn. There is a special sort of beauty that exists only in fall.

In celebration of this season I am compiling some of my favorite, go-to herbal recipes. Some of these are quite simple to make and others are a bit more involved. Read on for the healing benefits of the plants in each recipe. I hope you are inspired to make a few of these herbal concoctions…

May your autumn days be full of beauty and abundance!

SIMPLE ELDERBERRY SYRUP

elderberry.JPG

Elderberry is an important herb for every home apothecary, especially as we enter the colder months of cold and flu season. This syrup is very easy to make, tastes delicious and is one of the best things you can do to support your immune system. It is my go-to potion for sniffles, colds, flu, and anytime I am starting to feel run-down. Take 1-2 tablespoons a day for preventative measures and to keep your immune system going strong. This syrup is also delicious added to teas (or hot toddies!), or as a special garnish on desserts.

An herbal syrup might sound complicated, but really it is just a mixture of:
a strong herbal tea + a sweetener + brandy

elderberry syrup2.jpg

INGREDIENTS:

  • 1 cup dried elderberries
  • 1 teaspoon dried ginger root
  • 1 tablespoon dried cinnamon chips
  • 4 cups water
  • 1 cup local honey
  • 1/2 cup brandy

1. Create a strong tea (decoction) by slowly simmering the elderberries and spices in the water. Let the water content reduce by half, which may take an hour or more.  Keep an eye on the pot and make sure the water does not evaporate too much - if needed, add another cup of water.

2. Strain and discard the herbs from the liquid.

3.  Measure your remaining liquid. If you started with 4 cups of water, you should have 1.5 to 2 cups of liquid left. Add 1 cup of honey. You can adjust the amount to your taste, and preference for consistency. (If you want a thicker, sweeter syrup, add more honey.)

4. After adding the honey, cook on very low heat until just combined, usually just a minute or two. When using honey (especially raw honey) you want to be careful with the amount of heat you use.

5.  Remove from the heat and let cool. At this point your syrup can be considered finished, but if you would like extra preservative properties for a longer shelf life, add 1/2 cup brandy. Mix thoroughly.

6. Pour into clean glass bottles, label it with the ingredients and date, and refrigerate. The syrup will keep for several months when preserved with brandy and stored in the fridge.

Options: You could also add other spices such as cloves, cardamom or orange peel to this recipe. I also like to add in a small amount of dried rosehips for added Vitamin C content. Use this basic recipe as a starting point and let your creative juices flow!


ROSEHIP OXYMEL

The combination of honey, vinegar and herbs creates an ancient preparation called an oxymel. This simple medicine dates back to the time of the Greeks and has been used for many different ailments. Today we can make oxymels as a delicious way to preserve our favorite herbs, or to create a medicinal tonic.

The basic method of making an oxymel is to mix together equal parts honey and apple cider vinegar and pour this mixture over your herbs to steep. (Use more vinegar for a thinner oxymel, less vinegar for a more syrup-y oxymel.)

Rosehips are an excellent herb to incorporate into your fall herbal routine as they are chock full of Vitamin C and help our immune systems stay healthy. Use this tart honey-vinegar concoction directly by the spoonful, or add to seltzer water for a refreshing drink. You can also use it as the base for sauces, marinades and salad dressings.

INGREDIENTS:

  • Rosehips
  • Apple cider vinegar
  • Raw honey

1. Fill a pint sized jar 1/3 full of dried rosehips or 1/2 full of fresh, chopped rosehips.

2. Cover with a vinegar/honey mixture (start with a 1:1 ratio of vinegar: honey). Stir it up to remove air bubbles and cover the top of the jar with a sheet of wax paper before capping if using a metal lid. (Or use a plastic lid to avoid corrosion from the vinegar.)

3. Shake those hips! Shake the jar often to make sure the herb does not clump together. Add more vinegar if necessary.

4. Let infuse for 2 – 6 weeks. Then strain out using a cheesecloth and store in a tightly capped bottle out of direct sunlight.


SPICED ASHWAGANDHA HOT CHOCOLATE

What better way to take your fortifying ashwagandha powder than in hot chocolate?! Make this brew on cold nights -- it is lovely to sip on as you are winding down from the day.

INGREDIENTS:

  • 2 tablespoons Cocoa powder
  • 1 teaspoon Ashwagandha root powder
  • 1/4 teaspoon Cinnamon
  • a few sprinkles of freshly grated Nutmeg
  • 8 oz. Coconut milk* (or other milk of choice)
  • Honey or maple syrup to taste

This recipe makes one serving. Pour the milk into a small saucepan and whisk in the cocoa powder, ashwagandha powder, cinnamon and nutmeg. Heat gently over low heat for a few minutes, stirring occasionally. Pour into a mug and add honey or maple syrup to your taste. Enjoy!

*If using full fat coconut milk from a can I usually dilute it down with water to equal parts, i.e. 4 oz coconut milk plus 4 oz. water


HERBAL ROOT CHAI

root chai recipe.jpg

I love this chai because not only is it completely delicious, it is also very good for you. Dandelion, burdock and chicory roots are incredibly nourishing and make our livers happy. And astragalus is a sweet-tasting, tonic root that supports our immune systems — never a bad thing during cold and flu season. The spices in this recipe add a gentle heat that stimulates both our digestion and circulation. All in all, this root chai helps us to stay toasty and healthy during the cold months.

INGREDIENTS:

  • 6 cloves
  • 6 cardamom pods
  • 1 tsp. black peppercorn
  • 1-2 tsp. dried ginger root
  • 1 tsp. dried orange peel
  • 1/2 Tblsp. cinnamon bark (sweet or cassia)
  • 1 Tblsp. burdock root
  • 1 Tblsp. roasted dandelion root (roasted will yield a deeper, darker flavor)
  • 1 Tblsp. roasted chicory root
  • 1 Tblsp. astragalus root

Grind together the cloves, cardamom and peppercorn in a mortar and pestle. This will help their flavor be dispersed throughout the whole tea. Combine these crushed pieces with the remaining ingredients and mix thoroughly. Store in a tightly capped glass jar. This will make about 5-6 servings of tea.

To brew the tea, add up to 1 Tblsp. of the chai blend per two cups of water in a small saucepan. Bring everything to a boil, then lower the heat and let it simmer covered at for least 20 minutes. Just be sure to keep an eye on the water level and don't let it evaporate too much. When it is as dark and spicy tasting as you would like, strain out the roots and add milk and honey to taste.


AUTUMN APPLE TEA

Autumn Apple Tea.JPG

This unusual tea blends together some of the brightest notes of summer with our delicious New England fall fruits.


INGREDIENTS:

  • 1 tablespoon dried lemon verbena leaf
  • 1 tablespoon dried (or fresh) sumac berries
  • 1/2 tablespoon dried rosehips
  • 1 tart apple, cut into pieces

1. Place all the ingredients in a quart-sized jar.

2. Cover with freshly boiled water and let steep for 10 - 20 minutes.

3. Strain out the herbs and add raw honey or maple syrup to taste. Drink cool or warm.


MUGWORT INFUSED VINEGAR

Mugwort Vinegar.JPG

Mugwort is one of my favorite herbs, full of healing on several levels. It is contains many minerals and vitamins and its bitter taste stimulates the digestion. I love to use this vinegar on roasted vegetables or as a salad dressing. I also simply take it by the spoonful!

INGREDIENTS:

  • Mugwort
  • Apple cider vinegar

 1. In a pint sized jar, add 1.5 cups chopped fresh mugwort leaves and stems. (If using dried mugwort, add just 3/4 cup.)

 2. Cover the herb completely with apple cider vinegar, until the liquid reaches to nearly the top of the jar.

3. Stir with a spoon or chopstick to remove any air bubbles.

4. Place a sheet of wax paper over the top of the jar and then cap tightly with the lid. (The wax paper prevents the vinegar from corroding the lid.)

5. Let steep for 4 to 6 weeks, if you can bear to wait that long! Taste at intervals to see if the flavor is to your liking. When ready, strain out the mugwort through a fine sieve.

6. Place the remaining liquid in a dark colored, air-tight bottle and label. The vinegar can be left at room temperature if used within a few months. For a longer shelf life, store in the refrigerator.

Steph Zabel, MSc, is an herbalist and educator who helps urban dwellers connect with the plant world. She teaches seasonal herbal classes and is the founder of HERBSTALK, Boston’s community herbal conference. Learn more about her work at: www.flowerfolkherbs.com and www.herbstalk.org.


This blog series — Herbs and Botanicals— is for general health information only. This Web site is not to be used as a substitute for medical advice, diagnosis or treatment of any health condition or problem. Users of this Web site should not rely on information provided on this Web site for their own health problems. Any questions regarding your own health should be addressed to your own physician or other healthcare provider.

Marching into Wellness: Bitters and How They Make Us Better!

By Elizabeth, CN Co-Owner & Certified Nutritionist

There are many reasons for us to use bitters to “make ourselves better” on a regular daily basis (see the list below). 

At Cambridge Naturals, we offer an eclectic collection sure to please your palate for both cocktails and for good digestive health.

Bitters’ complex flavors do more than make your mouth pucker, or add “life” to a cocktail.  Bitters help us balance our appetite and our digestive processes by increasing the secretion of our digestive enzymes. And bitters are also known to help detoxify the liver. 
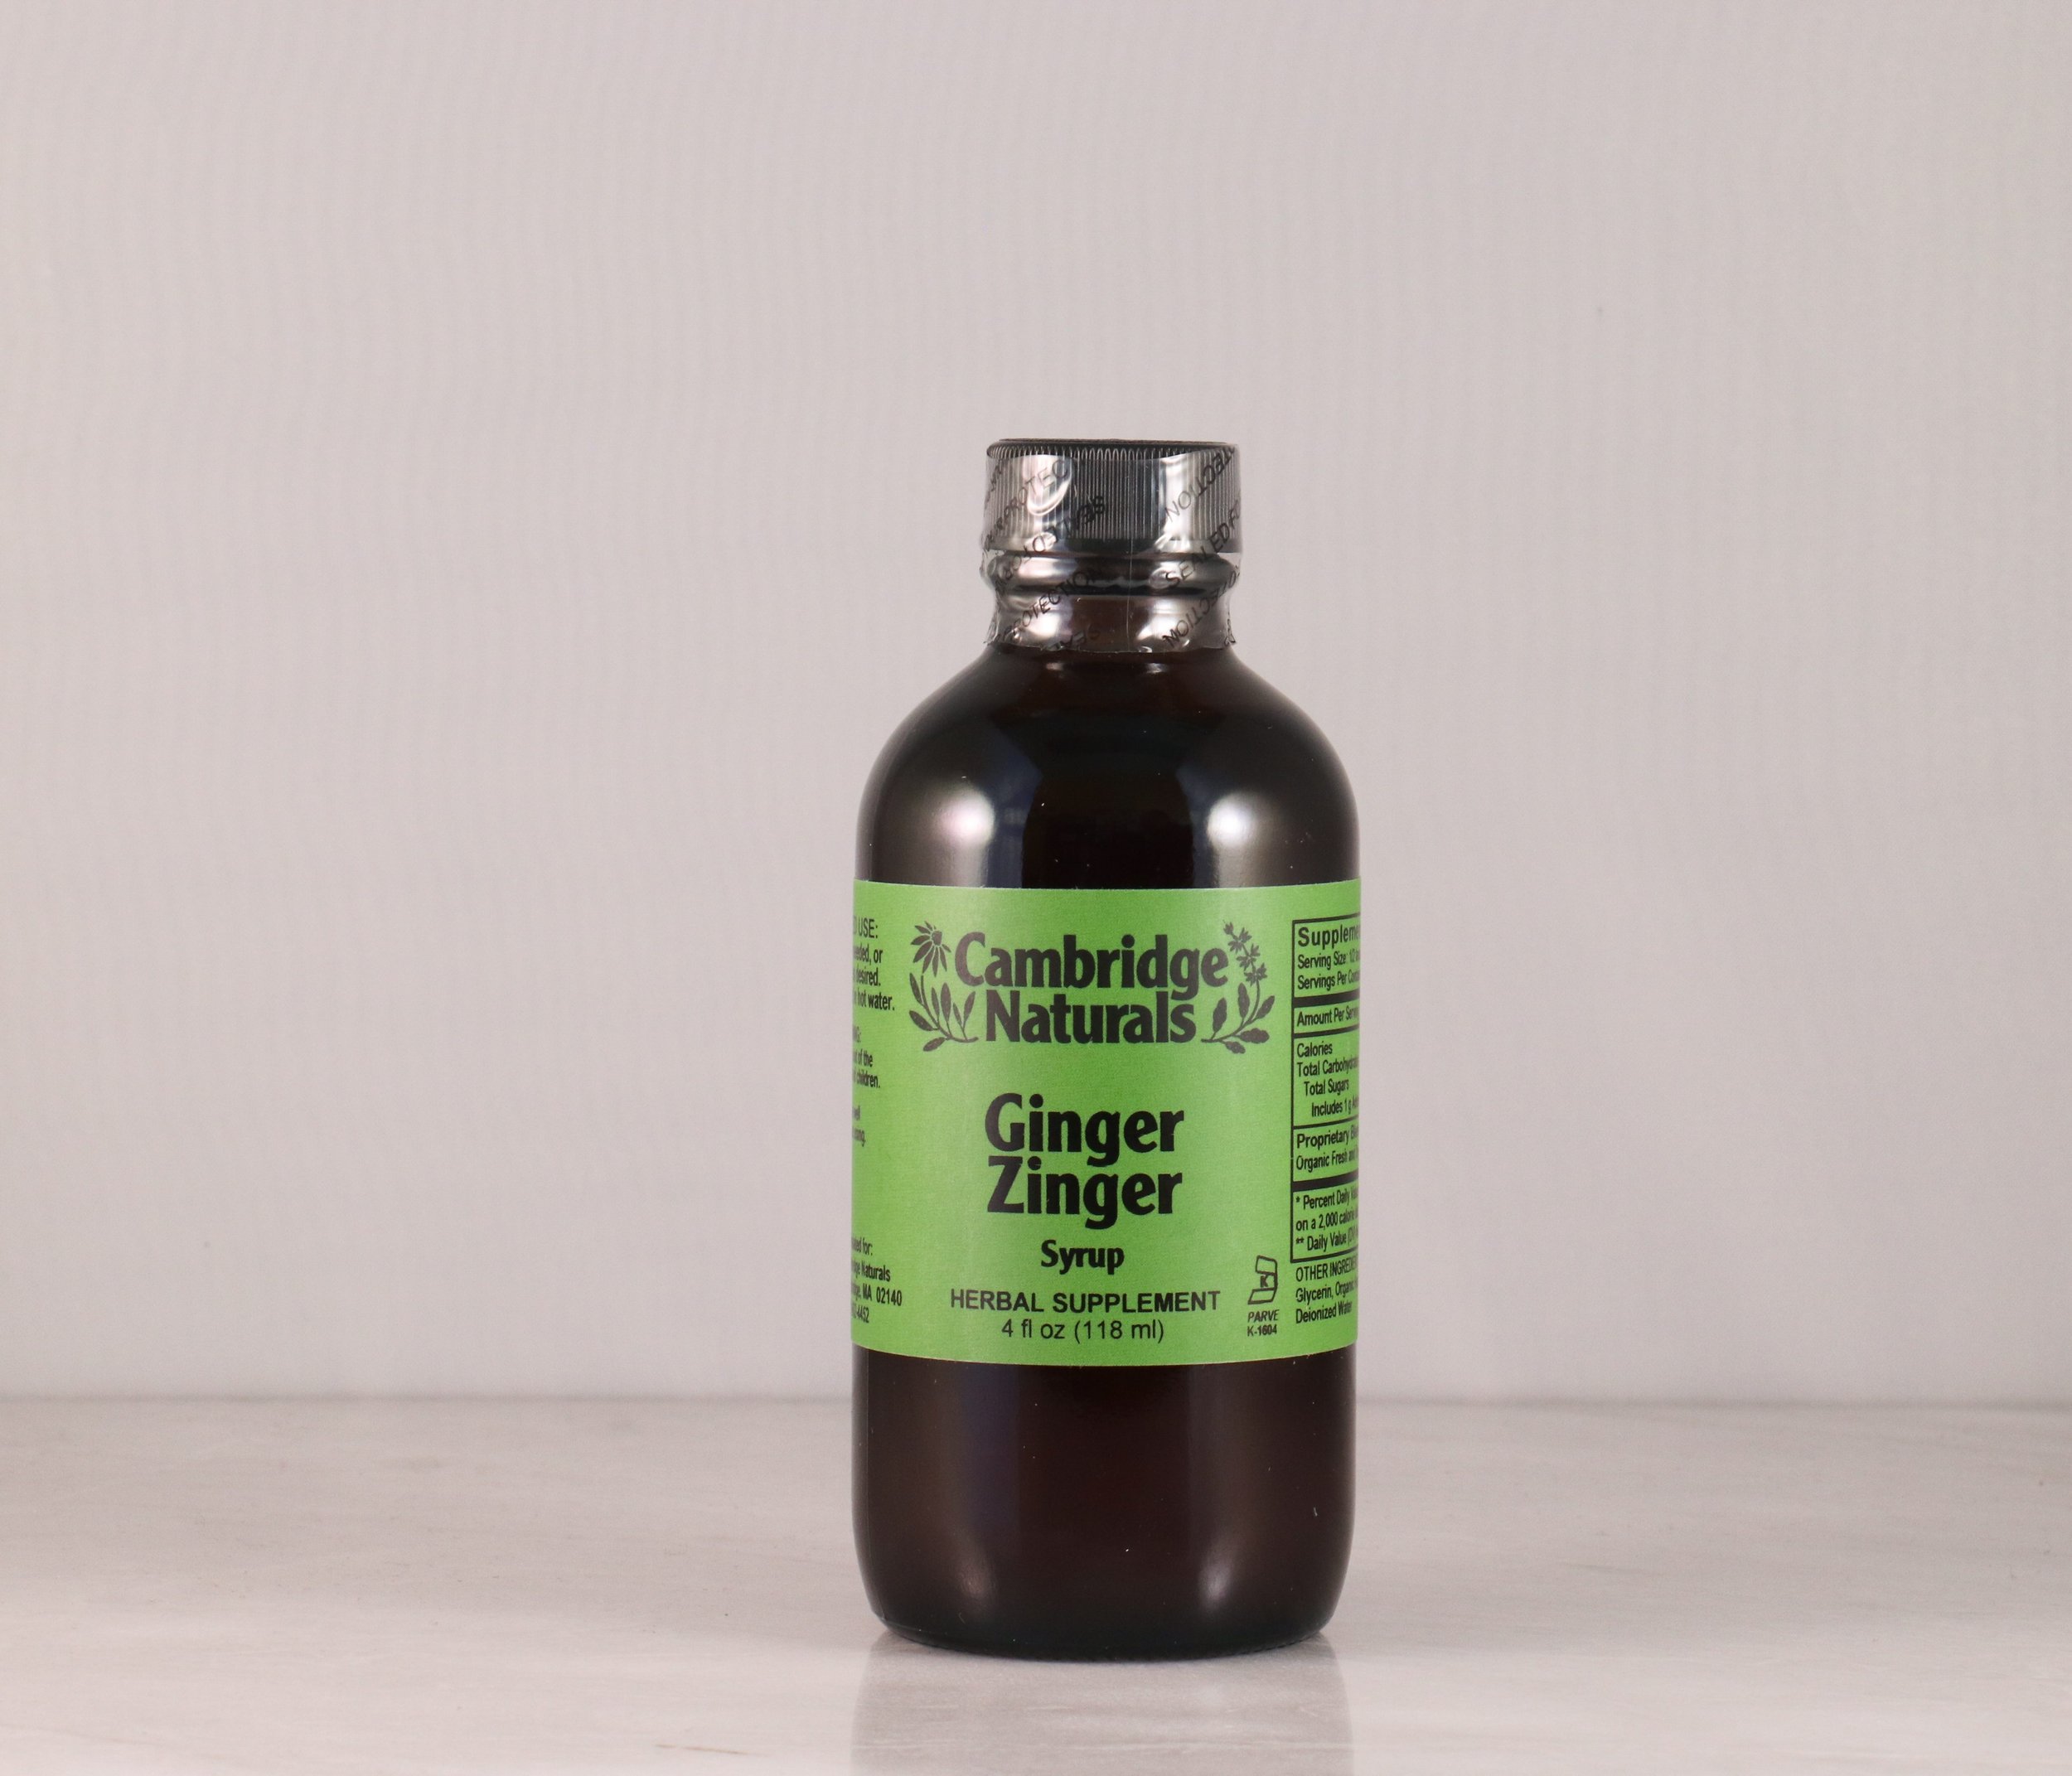
Made from the roots, barks, and flowers of many herb plants, bitters stimulate the production of saliva, gastric juices and bile.  

Where did this concept of using bitter plants for cocktails come from?  Bitters have a rich history in all the major civilizations of the ancient and modern world extending all the way from the ancient Egyptians to the 16th century prescriptions of the physician Paracelsus to the 19th century British practice of adding herbal bitters to wine …. all the way to today when we mostly think of them for cocktails with names like orange bitters, celery bitters, lemon bitters, Creole bitters, grapefruit bitters, chocolate bitters, peach bitters, and more.

Here are 2 new bitters from Urban Moonshine™ to please your palette:

Cider Vinegar Bitters (alcohol free), which “Supports Digestion” and is “Fast Acting Heartburn Relief.” It is both “Earthy and Sour!”

Healthy Liver Bitters, noted as “Sweet & Herbaceous” and it “Supports Digestion, Normal Detox & Healthy Cholesterol”


What Bitters Can Do For You:

  • Curb sugar cravings*
  • Soothe gas and bloating and relieve occasional heartburn*
  • Encourage production of bile & digestive enzymes*
  • Calm upset stomachs*
  • Increase absorption of vitamins A, D, E, K*
  • Help to maintain healthy blood sugar levels*
  • Balance appetite*
  • Ease constipation and regulate bowel movements*
  • Support liver function and healthy skin*

Ask our staff for some of our favorite bitters!

*This blog post — Bitters and How They Make Us Better! — is for general health information only. This Web site is not to be used as a substitute for medical advice, diagnosis or treatment of any health condition or problem. Users of this Web site should not rely on information provided on this Web site for their own health problems. Any questions regarding your own health should be addressed to your own physician or other healthcare provider.

Frankincense: A Sacred Resin

By Steph Zabel,
Herbalist, Ethnobotanist and Educator

Last month we covered an exotic, aromatic tree and this time we’ll continue with the arboreal theme. Except now we will explore a small, shrubby tree that is native to dry, desert climates (rather than tropical environments, like cinnamon is). The resin of this fascinating plant — native to India, Oman, Ethiopia, Somalia, Yemen and Saudi Arabia — has been used for over 5,000 years. It has been highly regarded as a medicine, an aromatic perfume, a ceremonial tool, and was once worth even more than gold.

Photo by Ben Norvell via Wikimedia Commons

Photo by Ben Norvell via Wikimedia Commons

Perhaps you are familiar with the scent of frankincense — often burned as incense in religious ceremonies. Or perhaps you are more familiar with the essential oil — sometimes referred to as olibanum. The oil is commonly used in aromatherapy for soothing chronic stress and anxiety, reducing pain and inflammation, and boosting immunity.

It is also an ingredient in many natural skin care products because of its anti-inflammatory properties. Frankincense is believed to help protect and heal skin cells and is used to reduce acne, prevent wrinkles and slow signs of aging. It is an astringent, meaning that it helps to tighten and tone loose, sagging or lax tissues. The essential oil can be added to any moisturizing serum as a nice, supportive addition to a daily skin care routine.

Its physical properties also make frankincense a powerful antiseptic; it is used to eliminate bacteria and viruses, and can help disinfect an area — use it as an aromatherapy spritzer or burn the resin for this purpose.

Photo by Mauro Raffaelli via Wikimedia Commons

Photo by Mauro Raffaelli via Wikimedia Commons

The astringent action of this plant can also help eliminate phlegm and congestion in the lungs. For mucous-y situations that seem to hang around in the respiratory system or sinuses, try frankincense as it will not only help to dry up mucous but will also act as an anti-inflammatory in the nasal passages, making breathing easier.

Finally, when rubbed on the body topically frankincense oil can improve circulation and the symptoms of joint or muscle pain in arthritic and rheumatic conditions. It tends to have a soothing effect for any sort of bodily inflammation.

The Chinese called it “fanhunxiang” meaning “calling back the soul fragrance.” It is often used in meditation, since the scent is calming, grounding and pleasant to the senses. It helps one to become more present in the moment and encourages feelings of peace.

Let’s speak a bit of the more esoteric and spiritual aspects of this amazing resin… Frankincense is a venerable old tree, in use for thousands and thousands of years. It was so highly treasured that it was brought as one of the gifts of the Wise Men to be presented at Jesus’ birth.  The resin was also found in the tombs of Egyptian mummies, used not only as an embalming agent, but also as an offering to help the departed souls make their journey to the afterlife.

Amongst many cultures around the world the fragrance of this resin was believed to increase one’s spiritual connection and intuition. The Chinese called it “fanhunxiang” meaning “calling back the soul fragrance.” It is often used in meditation, since the scent is calming, grounding and pleasant to the senses. It helps one to become more present in the moment and encourages feelings of peace.

Several religions use frankincense incense in their ceremonies. It may be used to prepare the environment for ritual, and is said to call forth the angels and other invisible beings to assist in creating sacred space. Symbolically, the smoke that rises as the resin burns helps to carry prayers and offerings to Heaven.
 

Burning incense _SZ.jpg

HOW TO USE

Make Frankincense Water:
Place 4-5 small pieces of resin in a quart sized jar. Cover with boiled water, cap, and let steep for a few hours or overnight. The resulting liquid will be light in color and a bit cloudy. Drink up to a cup or so a day, using your taste buds to guide you on your own proper dosage. This tea comes in handy when you are feeling congested. Many people also drink it to help with arthritic or painful joints.

Use the essential oil topically:
Dilute 10 - 15 drops of frankincense essential oil in 1 oz. of a carrier of your choice (olive, jojoba, grapeseed, or almond oil) and rub onto the skin. This is useful for scarring, acne, wrinkles and painful joints.

Burn the resin:
To burn the dried resin use a small charcoal disc (often sold to use in hookahs). Light the charcoal outside on a fire-proof dish and when it finishes smoking and sparking it should simply glow. Place 1 to 3 small pieces of resin on the charcoal and it will start to burn immediately. The resulting incense is pleasant and sweet and can be used to clear and purify the air.

NOTE: Frankincense should not be used during pregnancy, because of its emmenagogue and astringent qualities.

REFERENCES:

Sacred Earth
Dr. Mercola
Enfleurage.com

Steph Zabel, MSc, is an herbalist and educator who helps urban dwellers connect with the plant world.  She teaches herbal classes, is available for individual wellness consultations, and is also the founder of HERBSTALK, Boston’s community herbal conference.  Learn more about her work at: www.flowerfolkherbs.com and www.herbstalk.org.


This blog series — Herbs and Botanicals— is for general health information only. This Web site is not to be used as a substitute for medical advice, diagnosis or treatment of any health condition or problem. Users of this Web site should not rely on information provided on this Web site for their own health problems. Any questions regarding your own health should be addressed to your own physician or other healthcare provider.